Washi tape has become a popular tool for adding color, texture, and personality to crafts, walls, and everyday items. But did you know that washi tape can also be used on whiteboard? It’s perfect for teachers looking to spice up their classroom and for professionals seeking a fun and functional way to organize their ideas.
In this article, I’ll share the many ways you can use washi tape on whiteboards, from creating custom headers to color-coding your notes. So, get your favorite rolls of washi tape and get ready to take your whiteboard to the next level!
What is washi tape?

Washi tape is a decorative tape that originated in Japan.
It’s made from traditional Japanese paper called washi.
This paper is made from rice paper, the bark of the gampi tree, the mitsumata shrub, or the paper mulberry.
The paper is then treated with various materials, such as soybean or rice starch, to give it strength and durability.
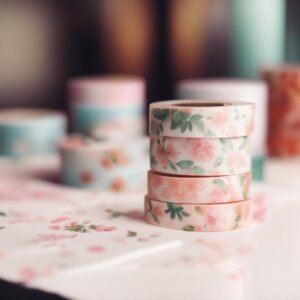
Washi tape is known for its versatility.
It comes in a wide range of colors, patterns, and designs.
It’s similar to masking tape in terms of its adhesive properties.
But washi tape is much more decorative and can be easily removed without leaving any residue behind.
This makes it a popular choice for various crafts and DIY projects, such as scrapbooking, card-making, and home decor.
With washi tape, you can add a pop of color and pattern to just about anything!
Using washi tape on whiteboard
Washi tape is an ideal material to use on a whiteboard.
Here’s why:
1. Customization
Washi tape comes in tons of colors and patterns.
So it will be easy to customize your whiteboard to your specific needs.
You can always apply some patterned tape to add visual interest.
2. Organization
Use washi tape to separate different sections of your whiteboard and color code their headers.
That way you can create a more organized and pretty-looking layout.
Now it will be easier to keep track of your notes and ideas.
3. Flexibility
Washi tape can be easily removed and repositioned as you need.
This makes it a great option if you need to make changes to your layout or if you want to reuse your whiteboard for a different purpose.
4. Creativity
Using washi tape on a whiteboard can also be a fun way for expressing yourself.
It’s great for teachers, for business meetings, and for any situations where you need to organize your ideas creatively.
5. Durability
While traditional whiteboard markers may easily smudge, washi tape is much more durable.
It sticks well, doesn’t fall off and will stay put until you remove it.
6. Versatility
While washi tape is commonly used for decorating, it can also serve functional purposes.
You can use it to create custom headers for your sections, color-code your notes, or create temporary labels for your items.
Washi tape on whiteboard usage ideas
Here are some creative ideas for using washi tape on a whiteboard:
1. Create a border
Use washi tape to create a colorful border around the edge of your whiteboard.
You can apply a single color or pattern, or mix and match different tapes for a fun and eclectic look.
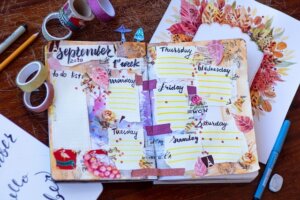
2. Make a calendar
Create a monthly or weekly calendar on your whiteboard with washi.
You can make a grid using tape and then use dry-erase markers to add in your events and appointments.
You can use a ruler or straight edge to apply the tape in straight lines.
3. Divide your board into sections
Apply washi tape to divide your whiteboard into different sections for different tasks or projects.
For example, you can use one section for brainstorming, another for to-do lists, and a third for notes and reminders.
Plus, color-code the headers of each section with washi.
4. Create a to-do list
Make a to-do list on your whiteboard.
You can use different tape colors or patterns for different tasks or priorities.
And then check them off by removing or applying pieces of tape.
5. Add some inspiration
Utilize washi tape to add inspirational quotes, pictures, or patterns to your whiteboard.
This can help to motivate you and brighten up your workspace.
6. Organize your ideas
Create mind maps, flow charts, or other visual aids on your whiteboard with tape.
You can apply various hues or patterns to distinguish ideas or concepts.
7. Decorate for holidays or events
Decorate your whiteboard for holidays, events, or special occasions with washi tape.
You can pick themed colors or patterns to create festive designs that match the occasion.
What you will need to use washi tape on whiteboard
To use washi tape on a whiteboard, you’ll need a few basic supplies:
1. Washi tape
Of course, the most important thing you’ll need is washi tape!
As I’ve mentioned earlier, washi tape comes in a wide range of colors, patterns, special finishes, and designs.
So you’ll have plenty of options to choose from.
Select a brand of tape that is easy to remove and won’t leave any residue behind.
My favorite set for use on whiteboards, journals, or planners is MT Washi tape.
This tape is really high-quality, made by the best Japanese brand of washi tape.
It’s writable, tearable by hand, easy to apply, removes with no residue.
And, according to the manufacturer, you can even wipe the surface with it with a wet cloth without it losing its adhesive properties.
Plus, this set is perfect for color coding.
2. Whiteboard
You’ll also need a whiteboard to use as your canvas.
If you don’t have it, then get this one:

It’s a good-quality unit that’s easy to use with washi and easy to clean.
3. Dry-erase markers

While washi tape is great for adding color and pattern to your whiteboard, you’ll still need dry-erase markers to write your notes and ideas.
Choose markers that are compatible with your whiteboard and won’t leave any permanent marks.
4. Scissors

Washi tape is usually easy to tear by hand.
But you may still need to cut it to the right length.
A good pair of scissors can be helpful for this.
5. Eraser

Finally, you’ll need an eraser to clean your whiteboard when you’re done.
Some whiteboards come with built-in erasers.
But you can also use a separate eraser or a clean cloth.
These are the basic tools that will help you enhance your whiteboard with washi.
But there are also some optional supplies that can be helpful.
Such as rulers, stencils, and adhesive putty.
How to use washi tape on whiteboard step-by-step
1. Clean your whiteboard
Before applying the tape, make sure your board is clean and dry.
Use an eraser or whiteboard cleaner to remove any previous markings or residue.
2. Choose your washi tape
Select the color and design you want to use for your project and that fits your style or theme.
3. Cut the tape to size
Use a pair of scissors to cut your tape to the desired length or shape.
You can use a ruler to help you create straight cut lines, or tear it freehand for a more organic look.
4. Apply the tape to the whiteboard
Once the tape is cut to size, carefully apply it to the whiteboard.
Start at one end and press the tape down firmly with your fingers, smoothing out any air bubbles or wrinkles as you go.
5. Create your design
Repeat steps 3 and 4 to add additional pieces of tape and create your desired layout.
6. Use dry-erase markers on the whiteboard
Once your washi tape design is complete, use dry-erase markers to write notes, ideas, or reminders around it.
7. Erase the whiteboard
When you’re ready to change or remove your design, simply erase the whiteboard using an eraser or whiteboard cleaner.
Then remove the tape if you want.
Washi should come off easily without leaving any residue or damage.
How to remove washi tape from whiteboard
Here’s how to remove washi tape from a whiteboard safely and easily:
1. Lift the edge of the tape
Start by lifting the edge of the washi tape gently with your fingers.
Or pick it with a thin tool, such as a plastic card or scraper.
Be careful not to pull too hard or too fast.
This may cause the tape to tear.
And you may want to reuse it later.
2. Peel off the tape
Once you’ve lifted the edge of the tape, slowly and steadily peel it off the whiteboard.
If the tape starts to tear or leave residue, stop pulling and move to step 3.
3. Apply heat
If your tape is low-quality and won’t come off cleanly, use a hairdryer or heat gun to soften the adhesive.
Hold the tool a few inches away from the tape and move it back and forth until it starts shifting.
4. Peel off the tape:
Once the glue has softened, try peeling off the tape again, using the same technique as in step 2.
The heat should help the tape come off more easily and there should be no goo left behind.
5. Clean the whiteboard
After removing the tape, use an eraser or whiteboard cleaner to clean the whiteboard and remove any remaining adhesive.
Make sure the board is completely clean and dry before using it again.
Will washi tape damage my whiteboard?
No, washi tape is designed to be super-easily removable and shouldn’t damage your whiteboard in any way.
However, it is always a good idea to test it on a small area first.
Especially if your whiteboard is old or already has a damaged surface.
Can I use washi tape on a magnetic whiteboard?
Yes, washi tape can be used on a magnetic whiteboard too.
Can I write on washi tape with dry-erase markers?
Yes, you can.
However, keep in mind that you may not be able to erase them off the tape as cleanly as from the whiteboard surface.
And some colors may be more difficult to read than others.
Can I reuse washi tape on my whiteboard?
Yes, you can reuse it on whiteboard.
However, the adhesive may weaken after multiple uses.
Also, make sure that both the tape and the whiteboard are clean and free of debris before reusing it.
Can washi tape be used for permanent markings?
No, washi tape is not designed to be used as a substitute for permanent markers.
Since it’s so easily removable, use it for temporary markings and decorative purposes only.
How do I store my washi tape?
To keep your washi tape organized and easily accessible, you can store it in a washi tape dispenser or a small box or basket.

Always keep it in a cool, dry place to prevent any damage or loss of adhesive qualities.
What other surfaces can I use washi tape on in addition to whiteboards?
Washi tape is a very versatile material.
It can be used on a variety of surfaces, including paper, walls, furniture, and more.
And as I’ve said earlier, it is best to test it on a small area first to make sure that the tape does not cause any harm to the surface or leave behind any residue.
To get started with washi tape on whiteboard, simply follow the step-by-step instructions and tips outlined in this article.
You’ll be amazed at how easy it is to create a beautiful and engaging whiteboard design that will make your workspace or classroom more enjoyable.