Removing cardstock from your Cricut mat can be a challenge, but don’t worry! With the right tools and techniques, it’s easy to do without damaging the mat or the cardstock. Whether you’re new to using a Cricut or have been doing it for a while, I hope you’ll find these tips helpful.
In this article, I’ll share the best way to remove cardstock from your Cricut mat effortlessly and accurately. I’ll also provide guidance on the materials you’ll need, and how to clean your mat after use. So let’s get started!
Cardstock is usually hard to remove from a Cricut mat
Cardstock can be a tricky material to work with on a Cricut mat.
Its delicate nature means that it can easily tear when being removed.
Plus, the sticky surface of the mat can make it difficult to release the cardstock without damaging it.
But don’t fret! With a little bit of care and attention, you can remove your cardstock from the mat without any tears or damage.
First, it’s important to be gentle and slow when removing the material.
And if you’re working on a project with intricate designs, extra care is necessary to prevent any tears or damage.
To help ensure a smooth removal, you can use tools and special techniques outlined in this article to carefully lift the design off the mat.
These tips should make removing cardstock from your Cricut mat a stress-free experience.
Always use the right type of Cricut mat for your cardstock type
When using a Cricut cutting machine, you must use the right type of mat for the particular type and thickness of cardstock that you’re using.
Cricut mats are essential tools for any crafter or creator.
They provide a stable surface for cutting, writing, and scoring with any Cricut machine.
There are a few different types of mats available that you can use depending on the type of material that needs to be cut.
The StandardGrip Mat is ideal for lightweight materials like vinyl and iron-on.
The StrongGrip Mat is better suited for heavier materials like leather, thick cardboard, and craft foam.
The FabricGrip Mat is designed to work with fabric, but it can also be used with some other thin materials.
Finally, the LightGrip Mat is perfect for paper and delicate materials like vellum, and tissue paper.
Different types of mats have different
grades of adhesion and fit different types of cardstock.
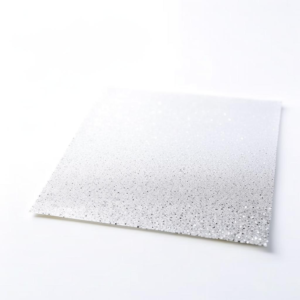
For instance, if you’re using a heavy cardstock or glitter cardstock, you should use a StrongGrip mat.
If you’re using thin cardstock, use the LightGrip mat.
For most types of cardstock, use the StandardGrip mat.
Using the wrong mat could cause the cardstock to tear when it’s being removed or move while being cut, resulting in an inaccurate cut.
Therefore, it is essential to always select the correct type of mat for your material.
I recommend getting an entire set of all mats to have each type on hand for any kind of cardstock or paper.

Never peel cardstock off mat by lifting a corner
One thing you definitely want to avoid when removing cardstock from your Cricut mat is peeling off the cardstock by lifting a corner or a small detail of the design.
This might seem like the easiest and quickest way to get the cardstock off.
But in reality, it can cause serious damage to your project.
Cardstock is delicate, and when you lift a corner, you’re putting a lot of pressure on that small area, which can easily lead to tearing.
Use a spatula tool or tweezers to gradually loosen the cardstock from the mat
Instead of pulling cardstock away by a corner, you can use a few tools to make the removal process a lot easier.
For example, a spatula, scraper, or even tweezers can be a real lifesaver.

These items can help you gradually loosen the cardstock from the mat and reduce the risk of tearing.
To get started, use the spatula or scraper to gently lift the edges of the cardstock from the mat.
Then slide the tool between the cardstock and the mat and gradually loosen it from the mat.
Remember to be slow and gentle in your movements. This will help ensure that the cardstock doesn’t rip.
And if you’re working on a project with small pieces or intricate details, tweezers can come in handy.
They can help you lift these delicate areas and tiny details without damaging your design.
Peel the mat from cardstock not cardstock from the mat
After you have loosened the edges and small details of your cardstock piece with a spatula or tweezers, you’ll need to remove the entire design.
Pulling it off the mat can still be damaging for your project.
But don’t worry, there’s an easier way to remove it!
Instead of peeling the cardstock off the mat, try bending the mat in your hand and curving it away from your project.
This will help to gently release the adhesive from the cardstock and make it much easier to remove.
To do that, just turn the mat upside down and slowly curve it away from the cardstock design.
You’ll be amazed at how easy it is to remove cardstock from your Cricut mat this way!
Always remove the cardstock from the mat very slowly and with care.
When removing your cardstock, do it slowly and be extra careful.
Rushing the process could make your cardstock project warp, bend, or even rip.
Once you’ve successfully removed the design, lay it flat on your work surface and give it a quick check.
Use tweezers and a lint roller to remove any remaining pieces of cardstock.
Once you have removed large pieces of cardstock from the mat, it’s time to get the remaining bits off.
The best way to do this is by using tweezers to pick them up.
If there’a any tiny debris left, just roll a lint roller over the surface of your mat. It will remove small pieces of cardstock that are still stuck on.
This method is especially useful for getting off any bits that you may have missed.
Be careful not to press too hard, or you’ll damage the mat.
Clean the mat with a lint-free cloth.
Once the mat is free of cardstock debris, it’s time to clean it.
Make sure to use a baby wipe or a lint-free cloth, as lint and other particles can stick to the mat and make it less tacky.
Take the wipe or cloth and gently wipe the mat to remove any dust.
Let it air dry completely.
Once the mat is clean and dry, it’s ready to use again.
Removing cardstock from your Cricut mat doesn’t have to be a struggle anymore. By following the tips and techniques I’ve shared in this post, you can easily remove the cardstock without damaging your mat or your project. Remember to use the right tools like a scraper and tweezers, peel the mat away from the project, and clean your mat properly after each use.