Are you wondering if Cricut can cut laminated sticker paper? Then you need this guide! In this article, I’ll share the best way to use your Cricut machine to create amazing laminated stickers.
We’ll go over the materials you need, the settings and pressure adjustments you’ll need to make. You’ll learn when to apply laminate — before or after cutting, and any tips and tricks for getting the best results. Let’s jump right in!
What is Laminated Sticker Paper?
For increased durability, you can laminate your stickers to protect the underlying material and prolong their lifespan.
The process of lamination is when you cover a sheet of printed stickers with a special thin layer of adhesive plastic laminate.
Laminated stickers are perfect for long-lasting and even outdoor applications!
They are waterproof, scratch-resistant, and fade-resistant, and can be used in a range of temperatures and conditions.
Plus, the extra layer of laminate provides extra protection against abrasion, UV light, and moisture.
You can make planner stickers, decals, product labels, promotional stickers, etc.
Can Cricut cut laminated sticker paper?
Absolutely!
There are two ways to use Cricut for cutting laminated stickers.
- The first way is to laminate your sticker sheet before cutting it with Cricut.
That means you should use the Cricut’s Print then Cut feature and laminate your stickers in between steps — after printing but before cutting.
Sometimes, cutting laminated sticker paper with a Cricut can be a bit tricky and there’s no default setting for it.
However, this is the fastest and safest method for cutting laminated stickers.
With the right settings, it will be a breeze.
- The second way is to apply laminate after cutting stickers.
The second way to cut laminated sticker paper sheets with Cricut is to apply the laminate after cutting the stickers.
However, this method can be a bit tricky and high-risk.
You’ll have to cut the laminate and sticker sheets separately and then put them together.
It takes a lot of precision to make sure all the cut lines are perfectly lined up.
Unfortunately, if you’re not careful, the laminate may get stuck inside your lamination machine and even damage it.
That’s why I don’t recommend this method.
How to cut pre-laminated sticker paper
By using Cricut’s “Print then Cut” feature and adding a layer of lamination between the two steps, you can create truly unique, durable, and professional-looking stickers.
Here’s a quick overview of the step-by-step process of cutting pre-laminated sticker paper with a Cricut machine.
- Print your sticker sheet using the Print then Cut feature.
The Cricut Print and Cut feature is a powerful tool that adds a whole new dimension to a range of creative projects.
It lets you print graphics and text onto the desired material, and then precisely cut out the printed designs with the Cricut cutting machine.
The way this works is that the printer adds special sensor marks to the paper that the Cricut machine is able to detect.
This allows the machine to accurately cut around the design and produce an ideal and professional look.
With this feature, you can create intricate and detailed designs, such as stickers, labels, and window decals.
- Then laminate your stickers.
Laminating a sticker sheet is an easy way to protect and preserve the stickers.
To begin, you will need a laminator, laminating pouches, and of course, the printed sticker sheet.

Place the sticker sheet into the laminating pouch and feed it into the laminator.
The laminator will apply heat and pressure to the pouch.
The plastic film inside the pouch will melt and firmly adhere to the sticker sheet.
Once the lamination process is complete, the sticker sheet will be sealed in a thin layer of durable plastic. And this will protect it from wear and tear, water damage, dirt and dust, etc.
Laminating is a great way to make durable, long-lasting sticker sheets and can extend the life of the sheet significantly.
- Then cut them with Cricut
Once your sticker sheet is laminated, you’re ready to cut it with a Cricut machine.
Be sure to firmly secure the sticker sheet onto the cutting mat and select the correct material and pressure settings.
Then, you can use the Cricut machine to get the perfect cuts for your sticker.
Use the Fine Point Blade and the LightGrip mat
To make sure your projects turn out looking their best, you’ll want to make sure you have a few key materials and tools on hand.
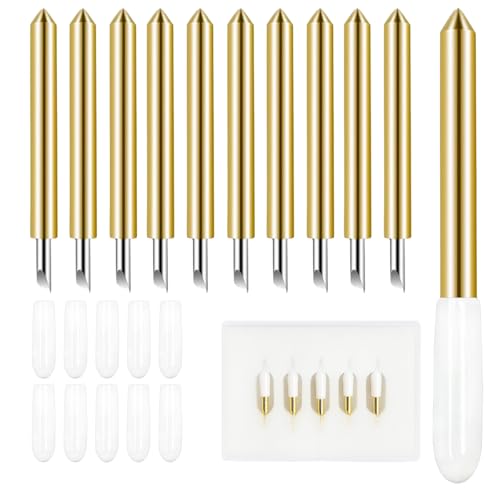
The Fine Point Blade is designed to provide precision cutting of intricate designs and works best with lightweight materials like laminated stickers, paper, vinyl, etc.

The LightGrip mat is also important when cutting these stickers as it secures the sheet to the cutting surface and prevents it from shifting as the blade moves but will easily release it without damage.
A good quality printer and sticker paper, and a scraper or brayer will also be necessary.

Plus, you’ll need a sharp pair of scissors or craft knife to make any adjustments or trim any rough edges.
Material settings
Using laminated sticker paper with a Cricut machine can be tricky.
Even though it’s a type of sticker paper, its special finish means it can’t be cut using the sticker paper setting.
This can lead to poor quality cuts, and even distortion.
To avoid that, it’s important to select the right material settings when cutting laminated sticker paper.
That way, you can be sure of a perfect cut every time!
How to kiss cut laminated sticker sheets with Cricut
Kiss cutting stickers means cutting through the laminate and the printed sticker layer but not cutting through the backing sheet.
This lets you create sticker sheets with multiple designs grouped together instead of individual die-cut stickers.
If you want to kiss cut your laminated stickers with a Cricut, then you should select the “light cardstock” or “vinyl” material setting.
This is because these materials are fairly thin, and the blade won’t be able to make a deep cut.
So you’ll get a shallow cut that goes through the laminate and sticker layer, but not the backing.
How to cut all the way through laminated sticker paper
Cutting all the way through the sticker paper including the backing will let you create individual die-cut stickers.
1. Use a thicker material setting
If you’re cutting through laminate sticker paper with your Cricut, use the “poster board”, “heavy cardstock”, or the “matte paper” material setting.
These materials are thicker, so the settings will give your machine the extra oomph it needs to cut all the way through the sticker paper and its backing layer.
This way, you’ll be sure to get clean and precise cuts.
Also, keep in mind that the settings for cutting may vary slightly according to the type of paper you’re using.
2. If you’re still having difficulties, increase the pressure to More.
If you’re having trouble getting your Cricut to cut through laminate sticker paper sheets, don’t worry.
The best way to get through those sheets is to increase the pressure.
Simply change the pressure setting from Default to More and the blade will cut through deeper.
This can make a huge difference, especially with intricate designs.
You may even want to test out different pressure settings to see which one works best for you.
3. Make sure the blade is sharp
When working with laminate sticker paper sheets, it’s crucial to ensure that you have a sharp blade to get a clean cut.
If your cuts are not as good as you’d like them to be or if Cricut can’t cut through even using the settings above, the first thing to check is the sharpness of the blade.
Generally, a dull blade is the culprit for less than perfect cuts.
If your blade is dull, don’t worry! You can easily replace it with a new one, or even sharpen it yourself.
All you’ll need is a piece of foil rolled into a ball. Pierce the ball with the blade a few times, and you should have a much sharper edge for your cuts.
4. Change the mat to a stronger one
When using a Cricut machine to cut laminated sticker paper sheets, it’s important to pick the right mat.
If you’re still having trouble getting all the way through using the LightGrip mat, opt for a stronger grip one like the StandardGrip or StrongGrip mat.
These mats are specifically designed to work with thicker materials, giving you a better grip between the material and the mat.
This will provide more stability for deeper and better cuts, making it easier to get through all the layers of the laminated sticker paper sheets.
5. Help Cricut read the registration lines
Cricut can sometimes struggle to recognize the registration lines because of the laminate layer.
However, there’s a clever way to get around this and make sure your cut is successful.
To help your Cricut machine read registration marks and cut laminate sticker paper sheets with accuracy and precision, it’s best to print the image twice.
Once on the sticker paper that you’ll laminate, and once on regular printer paper.
Then, cut out the center of the regular printer paper to leave the registration lines, and place the regular paper frame over the laminated piece. Try matching up the pieces so that the registration lines match up.
To make sure it’s secure, use painters tape.
That way, you can make your Cricut machine do its job properly.
6. Experiment with different settings to find the right one for your project
If you’re using a Cricut to cut laminated sticker paper for a project, experimenting with different settings and mats is key to getting the look you’re going for.
Try adjusting the pressure and materials settings and testing them out on a small piece of laminated sticker paper to compare.
Once you find the perfect combo, use the same arrangement for the rest of your project.
A helpful tip is to double-check the set-up before beginning to make sure you’re getting the results you want.
With a bit of trial and error, you’ll soon master the right mat and settings for your project!
7. Always do a test cut before you start a major project with laminated paper
Before you start your big project with laminated paper, it’s important to take a few moments to do a test cut.
It’ll save you a lot of stress down the road.
Testing your cut will ensure that everything is going to go according to plan, and that you won’t have any unexpected surprises.
So take the time to test cut before you invest too much time and energy into your project.
Projects that you can create with laminated sticker paper
Laminated sticker paper is a great material for a wide range of personalized projects.
One of the great things about laminated sticker paper is that it is durable and water-resistant. This makes it ideal for use on items that will be exposed to the elements or frequently handled.
For example, you can laminate water bottle labels. This will help the label stay in place and remain legible even if the bottle is exposed to moisture.
Car decals are another popular project that can be created with laminated sticker paper.
This material is great for use on cars as it is weather-resistant and can withstand exposure to the elements without fading or becoming damaged.
And of course, use lamination for making all kinds of professional-looking journal and planner stickers.
This protection is especially great for stickers that will be used on planner, journal, or notebook covers.
Custom phone cases are another fun project that can be created with laminated sticker paper.
With this material, you can create a design that is uniquely your own, whether it’s a favorite quote or a funky pattern.
The laminate layer helps to protect the design from scratches and scuffs, ensuring that your custom phone case will look great for years to come.
These are just a few examples of the many projects that can be created with laminated sticker paper.
So if you’re wondering if your Cricut can cut through laminated paper, the answer is yes! All you need to do is make sure you have the right tools and settings.