Have you ever struggled with finding the best Cricut setting for laminated sticker paper? After trying out several different options techniques, I’ve compiled this guide to help you get the perfect cut every time.
I’ll also share some tips and tricks to make the process easier. From blade sharpness to pressure and the right material setting choice, you’ll have all the information you need. Let’s dive right in:
Laminated sticker paper overview
Have you tried laminating your sticker sheets and die-cut stickers?
Laminated sticker paper is sticker paper that has a clear plastic film on top of the adhesive layer.
Lamination is becoming more and more popular among Cricut users because of its amazing benefits!
One of the best things about it is that it makes your stickers super durable, so they can last longer and withstand wear, tear, and scratches.
This makes them perfect for use in a variety of projects, from scrapbooking to home decor to journaling.
Another great benefit of laminated sticker paper is its water resistance.
Lamination provides a protective barrier over the sticker, keeping it safe from damage caused by moisture.
This means that you can use your laminated stickers in a variety of outdoor and indoor projects. And you won’t have to worry about them being ruined by rain or splashes.
Finally, laminated sticker paper also offers protection against fading.
The laminate layer protects the colors and images on the sticker from fading due to exposure to light, heat, and other elements.
So your projects will continue to look vibrant and colorful for years to come, even with regular use.
Give it a try and see for yourself why laminated sticker paper is such a popular choice among Cricut users.
However, keep in mind that the laminate layer can also make it difficult to cut the paper using standard paper or sticker paper settings.
Best Cricut material settings for laminated sticker paper
Cutting laminated sticker paper using Cricut’s default sticker paper setting may lead to failed or poor quality cuts, distortion, and raw edges.
So, you’ll need to experiment with other material settings to get the results you need.
Kiss cutting laminated sticker sheets with Cricut
Kiss cutting is when you only cut through the sticker and laminate layers, but not the backing.
This is a great technique for creating sticker sheets.
To kiss cut laminated sticker sheets with a Cricut, select the “light cardstock” or “vinyl” material setting.
These materials are pretty thin. So the blade will make a shallow cut that only goes through the laminate and sticker layers. Without ruining the backing sheet.
Cutting all the way through laminated sticker paper
If you want to cut all the way through laminated sticker paper and make individual stickers instead of sticker sheets, you’ll need to use a different approach.
Here are a few tips to help you achieve a clean and precise cut:
1. Use a thicker material setting
Use the “poster board” or “heavy cardstock” material setting, or the “matte paper” setting.
This will give your Cricut machine the extra strength it needs to cut through the laminate, printed, and backing layers.
Keep in mind that the settings may vary slightly depending on the type of paper or laminate you’re using.
2. Increase pressure
If you’re having trouble getting your Cricut to cut through laminated sticker paper, increase the pressure from Default to More.
This should help the blade cut deeper and stronger.
You can also try different pressure settings to see which one works best for you.
3. Make sure the blade is sharp
A dull blade can be the culprit for less than perfect cuts, so make sure your blade is sharp before you start cutting.
You can easily replace it with a new one or sharpen it yourself using a piece of foil rolled into a ball.
4. Change the mat to a stronger one
Use a stronger grip mat like the StandardGrip or StrongGrip mat, instead of the LightGrip mat, to provide better adhesion for deeper and cleaner cuts.
5. Help Cricut read the registration lines
If your Cricut is having trouble recognizing the registration marks because of the laminate layer, try printing the image twice.
Once on the sticker paper (which you’ll then laminate between steps) and once on regular printer paper.
Then, cut out the center of the regular printer paper image to leave the registration marks. Place it over the laminated piece, aligning them carefully.
This way, your Cricut machine can easily recognize the registration lines and cut the design accurately.
If this still doesn’t work, try cleaning the rollers and the cutting mat of your Cricut machine. Make sure there is no dirt or debris interfering with the recognition of the registration lines.
6. Experiment and test
Experimenting with the settings options provided above is crucial to finding the right one for your laminated sticker paper cutting project.
Everyone’s sticker papers, designs, and laminate sheets/pouches are different. So it’s important to take the time to test different options and see what works best for your specific machine.
Moreover, it’s important to do a few test cuts before committing to a full project.
This will give you a chance to see if the cutting is accurate and if there are any issues with the machine recognizing the registration lines.
Making small test cuts will allow you to make any necessary adjustments before wasting a lot of materials or ruining your project.
It’s also a good idea to use different types of laminate materials and sticker papers to see how the material affects the cutting process.
Some brands of laminate may be a tiny bit thicker than others, which could affect the way your machine cuts.
By experimenting with different types of laminate, you can determine which one works best for your project. That way you’ll save yourself time and frustration in the long run.
Materials and tools needed for cutting laminated sticker paper
Cutting laminated sticker paper with a Cricut machine is a fun and creative process that lets you create high-quality, professional-looking stickers.
To get started, there are a few essential materials and tools that you’ll need to have on hand.
First, you’ll need a Cricut machine.
If you’re new to Cricut, there are several models to choose from. From the compact and portable Cricut Joy to the powerful and versatile Cricut Maker.
No matter which model you choose, you’ll need to invest in a good cutting mat.

A LightGrip cutting mat is the best starting point for working with any paper projects.
Usually it provides just enough adhesion to hold the paper in place while also allowing for a clean, precise cut.
In addition to a Cricut machine and cutting mat, you’ll also need the Fine Point Blade.
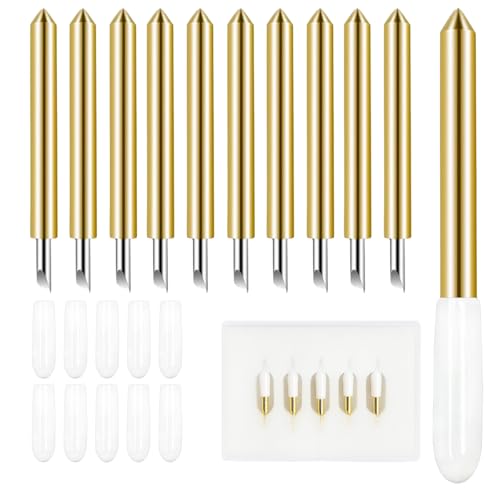
It’s the default blade that comes with Explore and Maker.
This type of blade is specifically designed to work with delicate materials, such as sticker paper, without damaging them.
Plus, the Fine Point Blade is perfect for cutting intricate designs and small details, like little stickers.
Cricut Joy has its own equivalent of the Fine Point blade — the Joy blade.
Other materials and tools you’ll want to have on hand include a good quality printer and sticker paper, laminate pouches, laminator, printer paper, and a brayer or scraper to help stick your project to the cutting mat.

You’ll also want to have a sharp pair of scissors or a craft knife on hand to trim any rough edges and make any necessary adjustments.

With these essential materials and tools in hand, you’ll be well on your way to creating beautiful and durable laminated stickers with your Cricut.
How to cut laminated sticker paper with Cricut and the right settings
Once you’ve printed and laminated your sticker sheets, and decided on the material and pressure settings, it’s time to load your laminated sticker paper onto your Cricut cutting mat.
- Place the laminated sticker paper onto the mat, help it adhere using a brayer, and load the mat into Cricut.
- You’ll want to make sure the machine sees registration marks.
- Use the double printing trick above to help it.
- Now you’re ready to begin cutting!
- Make sure you’re happy with your settings, double-check that everything is properly aligned, and start the cutting process.
- Keep an eye on your Cricut machine as it works, especially if you’re cutting intricate designs.
- It may take a few trial runs to get the perfect cut, but don’t get discouraged.
With a little patience and some experimentation, you’ll find the perfect combination of settings for your laminated sticker paper.
Once you’ve finished cutting, you can carefully remove your stickers from the mat and enjoy them!
Whether you’re using them for scrapbooking, decorating your planner, or adding a personal touch to your gifts, your laminated stickers are sure to make a statement.
Wrapping up, cutting laminated sticker paper with a Cricut machine can be a bit of a challenge. But with the right settings and a bit of practice, you’ll be able to get that perfect cut every single time! Don’t forget: select the right material setting, adjust the pressure if needed, check that your blade is sharp, use the right mat, and make sure your Cricut machine can read the registration marks. Keep all of these tips in mind, and you’ll be a pro at cutting laminated sticker paper in no time!