Wondering how to load paper in Cricut properly? I’m here to guide you through the process! In this step-by-step tutorial, we’ll cover two ways of loading paper: on a mat and with no mat — using smart materials.
Plus, I’ll share some expert tips and tricks to help you get the best outcome possible. So let’s get started!
How to load paper in Cricut
In order to properly load paper into your Cricut machine, you will need the following materials: paper or Smart Cricut Paper Cardstock, a fine point blade, a LightGrip mat, and a brayer.
Paper
You can pick pretty much any kind of paper that you like and Cricut will be able to cut it.
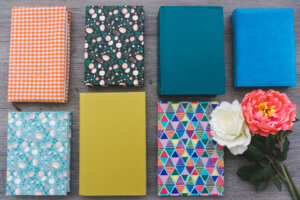
Cricut is a versatile tool that can cut many different types of paper. Including copy paper, cardstock, washi paper, photo paper, patterned paper, vellum, parchment. And specialty papers such as glitter, metallic, foil paper, and hand-marbled paper.
With the appropriate blade and settings, it can cut through even the thickest paper with incredible accuracy.
It can also be used to make intricate designs, from small detailed pieces to large expansive creations.
Most papers need to be loaded into Cricut machine using a mat.
However, there’s one type of paper that you can load in Cricut directly, with no mat necessary.
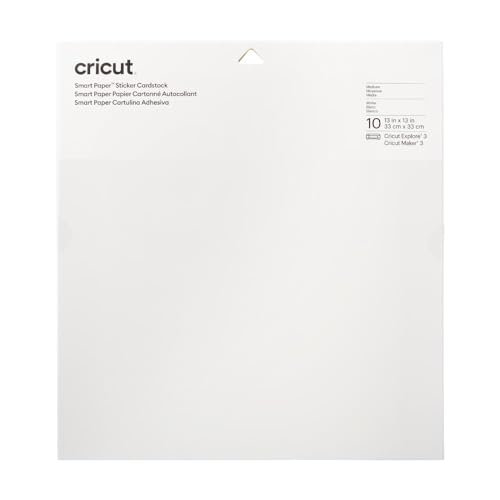
Smart Cricut Paper Cardstock
A great feature of Cricut Explore 3 and Maker 3 is that they are compatible with innovative Smart Materials, including Smart Cricut Paper Cardstock.
With these materials, you won’t need a cutting mat to get the job done.
Just feed them directly into the machine and get ready to create!
This means that you can create large-scale projects and intricate designs without having to spend extra time adhering materials to a cutting mat.
Fine point blade
The Cricut Fine Point Blade is the most useful blade for all your paper cutting needs.
It’s the ideal accessory for any Cricut machine user.
The blade’s fine point and high-quality steel body allow you to effortlessly create intricate designs with perfect accuracy each time.
Plus, its durability means you’ll be able to enjoy it for a long time to come.
And it’s compatible with both Cricut Explore and Maker.
LightGrip mat
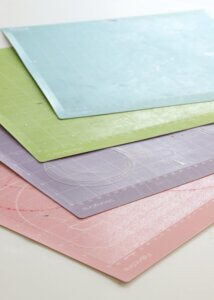
The blue LightGrip Mat is the best mat to load paper in Cricut.
Its tacky, non-slip surface will keep your paper in place without leaving any residue behind.
Plus, it’s available in several sizes – 12×12, 12×24, and two Joy sizes – so you can find the right one for your paper cutting project.
This mat is not included with the machine.
So I highly recommend investing in the LightGrip mat if you’re looking for the best results with your Cricut machine.
How to load paper in Cricut step by step
- Begin by placing the blade into the Clamp B portion of your Cricut machine.
- Then, place the paper on the LightGrip mat and secure it using the brayer.
- The brayer helps the paper stick to the mat well, resulting in smooth and precise cutting.
- Create a design and adjust the settings. Select “on mat” when prompted.
- Finally, place the mat into the Cricut machine, press the “load” button, and begin the cutting process.
How to load Snart paper in Cricut without a mat
- Begin by placing the blade into the Clamp B portion of your Cricut machine.
- The loading process is pretty similar. However, skip all the mat-related steps when using Cricut Smart Paper Sticker Cardstock
- Simply feed this special paper into your Cricut machine directly without a mat.
- Place one end of the Smart material into the machine, align it, let the rollers grip the paper. Press the “load” button.
- Then prepare the design, select “without a mat” when prompted and pick the smart material type from the list of materials.
Here’s a more detailed breakdown of both processes:
Place the paper onto the cutting mat
The first step in loading paper onto the Cricut cutting mat is to place the paper onto the mat, align it, and use a brayer or scraper to ensure it sticks to the mat.
- First make sure that the paper is cut to the desired size and that the Cricut mat is clean and free of any debris.
- Place the paper onto the mat in the desired position and align it properly to the upper left corner of the mat.
- Take a brayer and roll it across the paper and the mat, applying slight pressure.
- This will ensure the paper is secured to the mat and will prevent any slipping during the cutting process.
- Take care to avoid air bubbles, which can form when the paper is not securely adhered to the mat.
- Finally, check the alignment one more time to ensure the paper hasn’t shifted.
Once the paper is on the cutting mat, you can then load the mat into the machine and start cutting.
If you are using Cricut Smart Paper Sticker Cardstock, you can skip this step. Just load the material into the machine without any cutting mat.
Create the design and adjust the settings for cutting paper with Cricut
Now you’re ready to get crafting with your Cricut machine.
Start by selecting a design you love from the Design Space library, or try making one from scratch.
Once you’re done, click the ‘Make It’ button, and don’t forget to select ‘On Mat’ if you’re not using Smart Materials.
Finally, pick the setting for your paper type from the Design Space Materials menu, and you’re all set!
Load the mat into the cutting machine and press “Go”
After you have applied your piece of paper to the mat, it’s time to load the paper into the Cricut cutting machine.
- First, make sure the mat is aligned perfectly to the guides.
- Carefully insert the mat into the cutting machine and press the “Load mat” button.
- You’ll see the machine grip and load the mat.
- Now you’re all set and ready to start cutting!
- Simply press the flashing “Go” button and wait for Cricut to begin cutting.
- The machine will automatically adjust the blade depth and speed to match the paper type and will start the process.
Unload the mat and remove paper
When your machine is done cutting, press the “Load/unload” button to unload the mat with the paper from Cricut.
You’ll want to be extra careful when handling your paper cut.
Gently pick up the edges, corners and small details of your paper cut with a spatula tool or scraper to loosen them.
Now, turn the mat face down on a flat surface and slowly and carefully bend the mat away from the design to release the paper design.
This is a great way to remove the paper from the mat without any damage or tearing.
How to load Smart Paper Sticker Cardstock into Cricut
If you’ve got the Cricut Explore 3 or Cricut Maker 3 machine, you’re in luck!
You can easily cut Smart Paper Sticker Cardstock without a mat.
Older generation machines won’t be able to cut it without a mat. So you’ll need to place the Smart paper on a mat for those units and use the instructions above.
- To get started, pick a design from the Design Space library or make your own.
- You can resize it to whatever size you’d like.
- Just make sure to leave some space above and below the design, so the machine can grip and load your material.
- Then click the ‘Make It’ button and select ‘Without Mat.’
- Finally, select the “Smart Paper Sticker Cardstock” setting from the Design Space Materials menu, and you’re ready to go!
How to load Smart paper into Cricut
- Gently place the Smart paper cardstock up against the left material guide and slide it in under the mat guides and up against the rollers.
- Then press the “Load” button that you use to load mats.
- The machine will then begin to measure the paper piece and will attempt to realign it if it is loaded unevenly.
- Don’t worry if your Smart paper bows in the center while the machine is loading it. The material will be lying flat after the measuring is done.
5 However, if it is still not lying flat, simply press the Load button to unload it and try again.
- Next, press the flashing “Go” button to begin the cutting process.
- This loading process is the same for all Cricut Smart Materials, so you can cut paper, vinyl, iron-on, and other materials without a mat.
- Once your cutting is complete, hit the “Load” button again and the paper will be unloaded.
- You will then be able to remove it from the cutting area and continue working on your paper craft project.
By following a few simple steps and having the right supplies, you can load paper into your Cricut machine without any hassle.
Whether you prefer to use a mat or a smart material, you’ll be able to get your crafting project done.
Now that you have this knowledge, you can confidently dive into your next creative project. Happy crafting!
